Real Estate Photography
In order to avoid such photographic problems as geometric distortions, poor lighting, a grainy, noisy, or pixilated look, you need to have good real estate photography equipment. Saying “good”, I don’t mean expensive.For settings and lens characteristics play an important role. Studying various techniques, you will learn how to make appealing property photos without having the latest model and wasting many hours on photo editing.I wrote an honest review of the things you need to have in your working bag when you are planning to start your. I will prove that you need $4,500 in your pocket to buy all the necessary gear. Riff raff diesel.
Contents:.Professional Real Estate Photography Equipment Must Have List:. Best camera for real estate photography. Best wide angle point and shoot camera for real estate. Best lens for real estate photography.
Real estate photography lighting. Best flash for real estate photography. Best flash diffuser for real estate photography.
Best lens for real estate video. Best camera for real estate videoI think there is a lot of ridiculous stuff being said on YouTube, Facebook or Twitter about cameras and lenses what you need or don’t to be a so-called “professional photographer”. Honestly, it drives me nuts, because I work in this industry since 2009’s. The first few years I didn’t make much money, I struggled. But, I was determined to push ahead and make it work.Best Camera for Real Estate Photography 2017-2018This part of your gear is a very important part of your overall system, it’s a kind of guts or the heart of your whole operation.
Pro House Photos is a Professional Real Estate Photography company serving Houston and Austin. We provide real estate photography, real estate videos, aerial photography, 3D Immersion Tours, Virtual Tours, Sunset Photography, Fauxsets.
We are going to talk about crop bodies so there’s no need to spend tons of cash. Go cheap but don’t go too cheap. Increase your real estate photography pricing without wasting your money.Mirrorless Cameras. There’s a few different options.
If you can’t catch anything about real estate photography equipment and photography or photo editing or any of that, I would advise you working with the embody, the in-camera HDR option. It is simple for those who just trying to find out how to become a real estate photographer, and you will have decent results. It’s not very qualified if you are going to have a pretty good result, choose this option. The camera is going to blend three exposures together automatically for you. That’s probably the basic of the basic that you could use if you didn’t have any time.If you know photography a little bit, set up the camera to bracketing shots. It means is that you can make the camera take a picture at 0, -3 or +3.
So you’re getting a wide range of lightning situations for each image. When I take -3 so it’s going to be dark inside but the windows will be crisp, if I use 0 it’s normal condition, but if I put +3, it gives me a very nicely exposed image on those really dark images in the image. So you can break them into Lightroom or any software, use and blend those three together and get a perfect photo for editing.The ISO settings that I would recommend is AUTO ISO and have a range of 100 to 400.
If you have more than 400, you start to have a bit of noise and grain, so I definitely wouldn’t recommend going much higher than that unless it’s a super dark room, it’s night, and it’s a very long exposure. The Aperture that I’ve noticed to work pretty well for the most wide-angle lenses is f/8. It’s a good setting for just your general real estate photography.
If you go too low like 3.5 through your camera – it’s gonna be sharper in the middle, and the outsides will be softer. If you have f/8, it’s a good setting with not a super long exposure, so it does let light in.Changing Shutter speed for real estate photography, you should consider the amount of natural light. Optimal choice is the speed between 1/60 and 1/2 a second. See the camera settings for indoor photography I frequently use on the picture below.Best Lens for Real Estate PhotographyIt would depend on the kind of camera that you’re using. Under the following conditions, full frame and crop are essentially the same.
Photographers like to zoom into their photos but clients really don’t do it. I’m laughing when see examples in the Internet about how the best lens for real estate photography crop sensor has just totally less quality than the full-frame.
Clients are never dropping you because you shoot crop, and you’re never gaining clients by shooting full-frame. When you compare the images, look at them like your clients will, don’t zoom in, because your clients aren’t.Full Frame Lenses.
Sigma 10-20mm F3.5 Ex DC HSMThe two-time ultra-wide-angle lens offers excellent wide-angle shooting capabilities both indoors and outdoors. Even taking into account the crop factor, its range of focal lengths covers the most commonly used wide-angle values from 15 to 30 mm. While mastering architecture and real estate photography, this high light-output ratio makes shooting in cloudy weather simple. The field of view varies in the range 102.4º - 63.8º (depending on the version), which allows you to get an exaggerated perspective. Additional Real Estate Photography EquipmentReal Estate Photography Tips Techniques About TipodsYou should have a tripod because of stability.
The next benefit is that it slows down your workflow – you can think about composition, walk around the territory and think about a perfect angle, contemplate the scene, the light and the settings first. You don’t have to buy a carbon fiber one, you can even get a cheaper Manfrotto which is still and solid. You don’t need to attend to understand that using tripods in the crowded place, e.g. When you take architecture photos, is not always appropriate.
Drones Photography Demands Real Estate Photography CertificationKeep in mind that it’s not a full comparison of everything that’s out there, that’s just what I see. First thing you need to do is to have your FAA part 107 license – the real estate photography certification before you do anything commercial with a drone. It does include real estate listings, you can get fined up to $11000 if you are doing this for real estate listings without part 107. Here you’ll read about two drones review. The first drone is cheap and designed for beginners who want to try this style of property photography, the second one for those who want to produce professional bird-eye shots and videos.
What Gear Can Increase Your Real Estate Photography Income?Real estate photo editing can be made in two programs – Lightroom and Photoshop. The choice of the software depends on the adjustment complexity you need to do.
Adobe LR is good for fast color correction, noise and blur reduction, making vertical or horizontal straightening, resizing. If you need deeper photo editing as lawn retouching, sky enhancement, object replacement/removal, wall or floor cleaning, etc. Or looking for the best HDR software for real estate photography – use Adobe PS.In most reviews, you will be advised to have along with you such stuff as black cinefoil, color correction gels, swivel umbrella adapters, expensive sand bags, and other equipment that, in fact, you will need only in rare cases for one or two photos. I mentioned the real estate photography equipment that proves to be the best for beginners.
Anyone who has read Improve Photography for a while knows that I'm not a real estate photographer, but this week I had the chance to do a real estate photography shoot and I learned a lot of tips and tricks that I hope to share.My parents are selling their home, and I couldn't bear to let the real estate agent take the photos of the home I grew up in. I am firmly convinced that real estate agents intentionally make houses look terrible in MLS listings. Terrible, and terribly small.When I purchased a home a year ago, I wasted a tremendous amount of time looking at homes that I would have known weren't a fit for me if the photos had done a better job of showing the layout of the home. Also, the home we eventually bought wasn't even on our short list of homes we saw online because the photos made it look very small.I set out to accomplish three things in this shoot: (1) I wanted the home to look large. It is a large 5 bedroom home, but the layout is not open. (2) I wanted to capture photos that were unique from what most real estate photos look like so as to grab attention of potential buyers, and (3) I wanted the home to look bright and clean. This home has many large windows, so I wanted to show off the lighting in the home.If you need to figure out your own real estate photography pricing, I actually sell in my Real Estate Photographer's Starter Pack.
In the bundle, you also get a legal contract to use between you and the real estate agent, and 10 Lightroom presets for real estate photography to make your photos look polished and professional right from the get-go.The following are some of the photos I took in the shoot and a step-by-step guide of how I made the photos. I don't claim that any of them are perfect–after all this was the very first time I shot real estate–but hopefully it will provide you with helpful pointers if you are asked to do real estate photos at some point. Living area photo Photo of the Main Living AreaThe living room photo is probably the most important photo in a real estate listing. The photo of the back yard shows a little distortion, but I think the advantage of seeing the entire yard in one photo is more valuable than avoiding the little bit of distortion. Photo of the YardTo make this photo, I used the typical real estate photography recipe: Smash yourself up into the corner so as to take advantage of every inch of the space, set your lens to the widest possible focal length, and fire the shutter.The area in this photo was a bit too wide even for the real estate recipe, so I shot three photos in vertical orientation overlapping them by about 30% and later stitched them together in Photoshop.
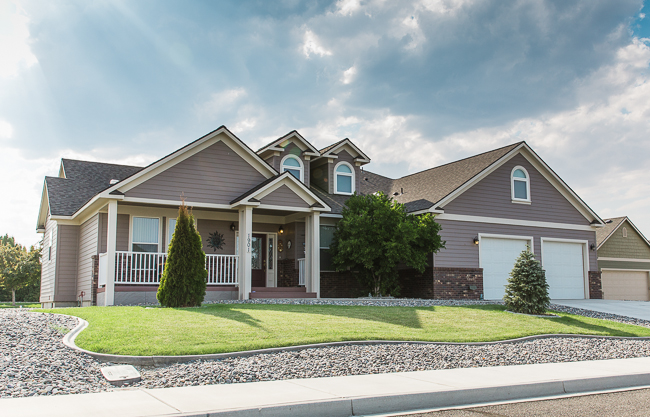
The wider the lens you shoot, the more overlap you need to overcome the distortion.The sky was quite overexposed in the original photo, so I used the HSL tool in Lightroom to bring down the luminance of only the blue colors in the photo. This brought down the exposure of the sky to bring out more color and more closely match the exposure of the rest of the scene. This high view shows the neighborhood. Taken with a DJI Phantom and GoPro Hero 3. Photos of the NeighborhoodOne of the main selling points of this home is that it is in an established neighborhood with large mature trees, a park, and wide streets.I chose to capture this selling point in a photo using the DJI Phantom, an RC helicopter that is strong enough to lift a GoPro Hero 3 camera.
In the United States, the FAA prohibits the use of RC helicopters for commercial purposes, but this shoot was not a paid shoot. I only use the helicopter for aerial photography when doing non-commercial projects.I shot this photo early in the morning so that it would benefit from the sunrise lighting. I set the GoPro to time lapse mode so that it would take a photo every two seconds. Then, I simply flew around at different heights and distances from the house until I got the shot I wanted.The GoPro has a lot of distortion, so I usually try to point the camera up so the horizon is in the middle of the photo. This is terrible for composition, but it minimizes distortion.
Jade cocoon 2 ps2 how unlock the 8th slot. I reduced the distortion in this photo using Photoshop, but I didn't completely straighten the horizon because I actually like the “small world” look in this shot.Last, I put text on the photo to show which house was the one in the listing. ConclusionShooting real estate or architectural photography is a real skill.
I learned quite a few tips, but I'd like to do a few more shoots before I could call myself proficient in this area of photography. I don't have any interest in pursuing it as part of my business, but it was a fun challenge.To see the MLS listing with more photos from this shoot,. Gear I Used for this Real Estate ShootNikon D800 – Honestly, any DSLR or camera with manual exposure controls would capture photos of excellent quality for a real estate listing, but I'm most comfortable with this camera so that is what I used.Nikon 14-24mm f/2.8 Lens – This lens is extremely wide on a full frame sensor, but it definitely distorts the edges of the frame.
Still, it did well and the resulting photos were acceptable.DJI Phantom – I used this RC helicopter to capture the aerial photos of the home. The DJI Phantom has GPS in it, so if it loses contact with the controller or goes out of range, it goes to the initial GPS location where it took off and then lands itself. It's an amazing innovation in aerial photography.GoPro Hero 3 Camera – This camera was used for photos from the aerial rig. The GoPro Hero 3 is very lightweight and good for mounting in small locations to get some footage. It had a lot of bugs in the camera when it was first released, but a recent firmware update made it much more stable.Induro AT-313 Tripod – This is an extremely sturdy tripod that has extra long legs for achieving a high perspective in some of the photos. Induro Tripods are incredibly sturdy and very fairly priced.Vanguard SBH-300 Ballhead – This ballhead costs about $99 and is strong and durable. This one has lasted me many years and still does the job.YN560 II Flash – This is my favorite flash.
It only costs $60, is simple to use, and in my opinion is just as good as the expensive Canon or Nikon brand flashes. There is a new version of this flash available now (YN560III) that has a built in radio receiver.